Sunday, August 28, 2011

Tomato and goat cheese mini quiches


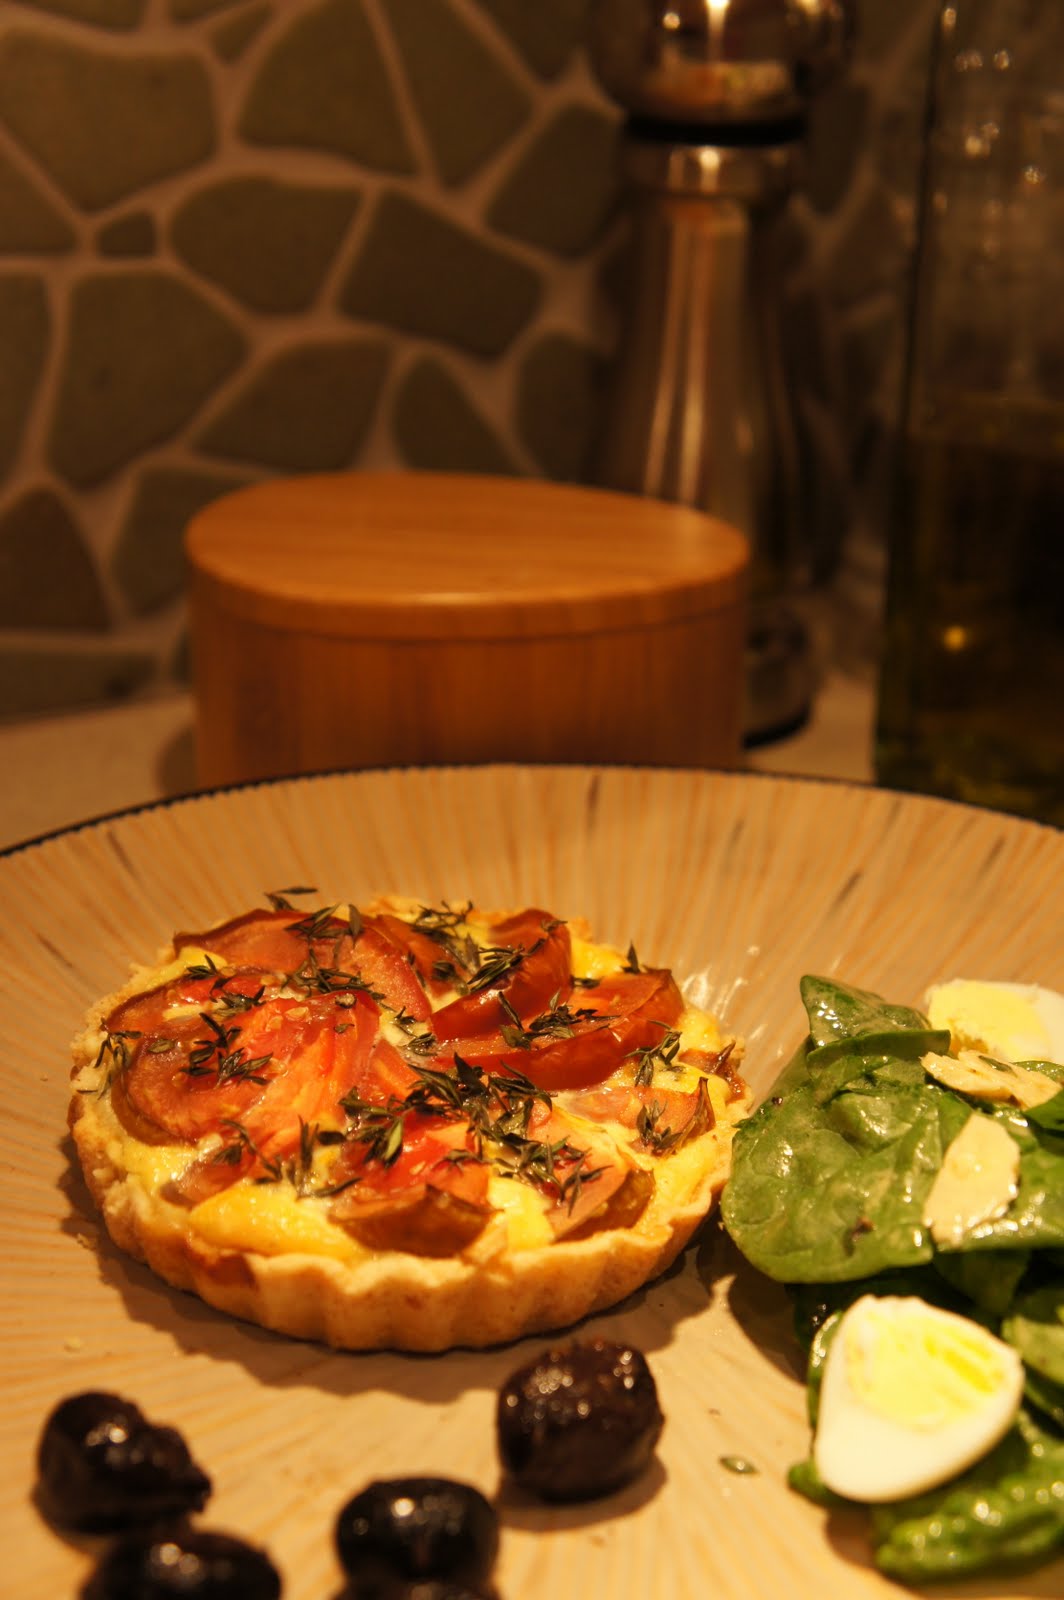
The purchase of my six mini pie dishes has been a wonderful investment. I can make six mini quiches one day and have a delicious dinner for my husband and me three dinners in a row. Throw in a small salad and you have a complete and satisfying meal.
When I was a kid, my mother only made one kind of quiche: quiche lorraine, for which she used our fabulous local Comte cheese as well as petits lardons. My mom is a creature of habit and she has been cooking the same things the same way for decades. If I told her I made quiches using tomatoes, shallots and thyme, and replaced her beloved Comte with goat cheese, her heart may skip a beat.
Of course, my ingredients have nothing extraordinary, but their uniqueness is in their freshness: Black tomatoes from our local famers market, fresh thyme, fresh goat cheese, local eggs and cream and homemade pie dough.
The pie dough I made is based on a recipe by famed U.K. -based, French chef Michel Roux. Thumbs up Michel: your recipe worked out well for me!

Pie dough or Pate Brisée:

1 ¾ cups (250g) all-purpose flour
2/3 cup (150g) butter, cut into small pieces and slightly softened
1tsp salt
Pinch of sugar
1 medium egg
1 tbsp (15ml) cold milk

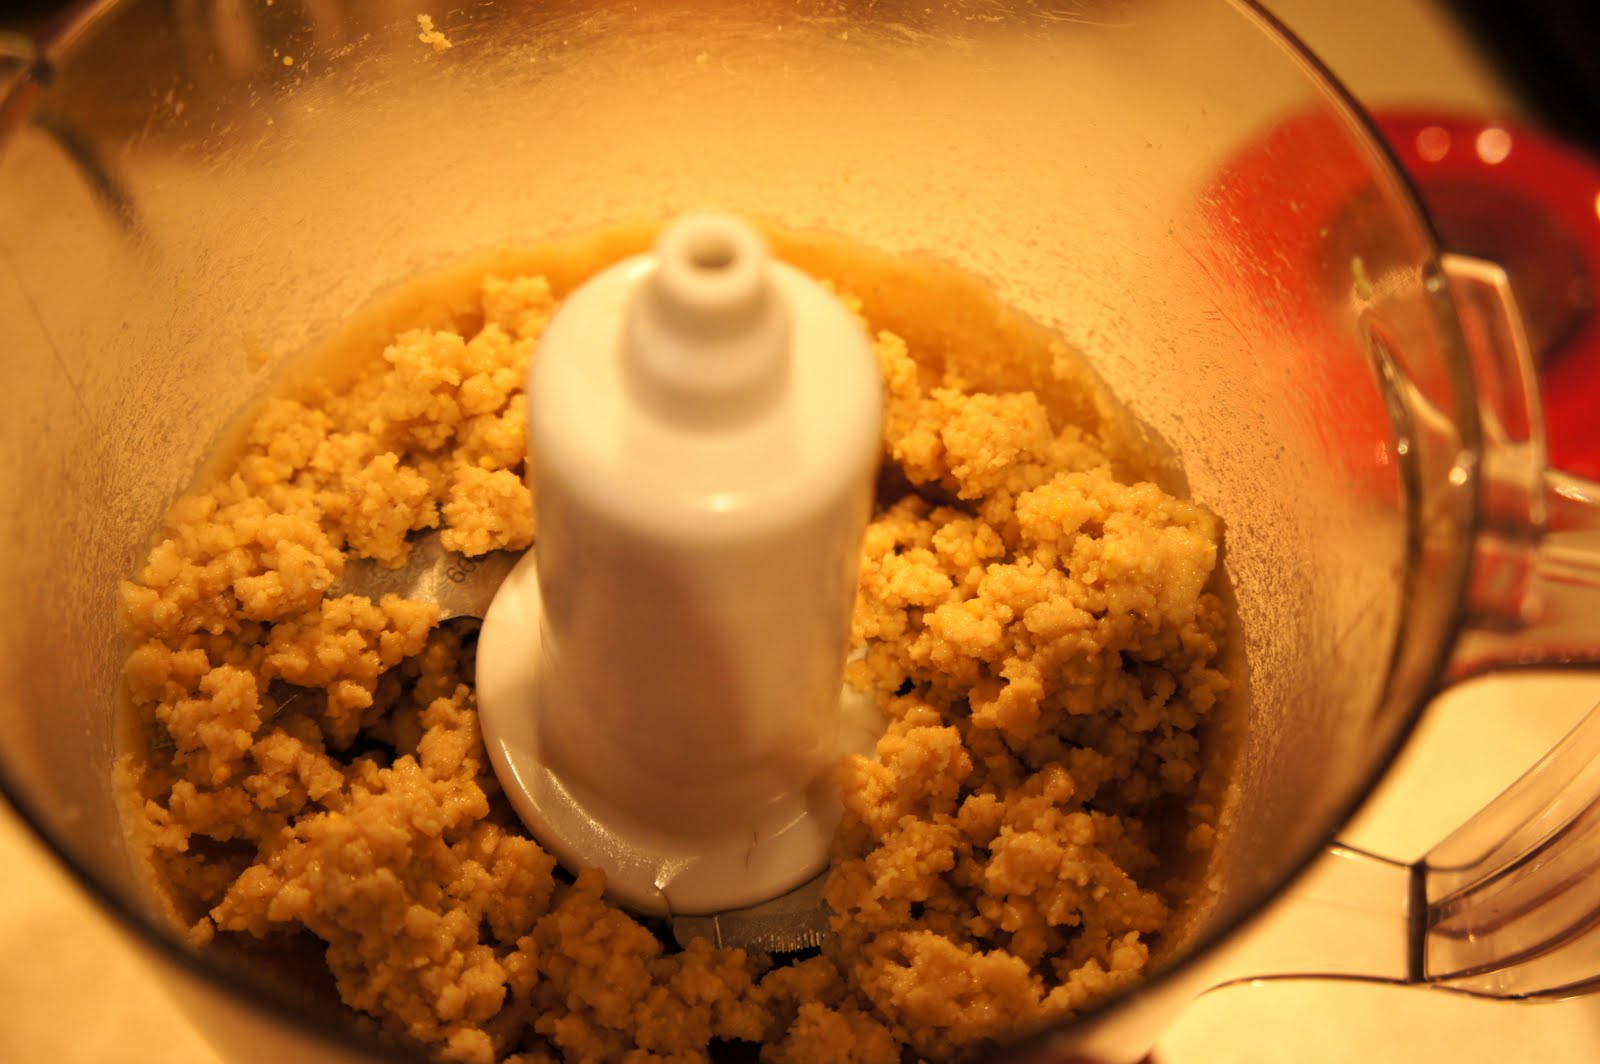
Mix together the flour, sugar and salt on your kitchen counter or in a large bowl. Make a well, and in the middle of it, put the butter and egg. Using your fingertips, mix and cream these together.
Blend until you get a grainy texture, then, add the milk. Incorporate gently with your fingertips until the dough begins to hold together.
When the dough is smooth, roll into a ball, wrap in plastic wrap and chill at least one hour.

Tomato and Goat Cheese Mini Quiches: (Petites Quiches aux tomates et Fromage de Chevre)

For 6 mini quiches

Pie dough or pate brisée
6 small tomatoes on the vine
2 large shallots, finely chopped
½ cup fresh goat cheese, kept cold for easier crumling
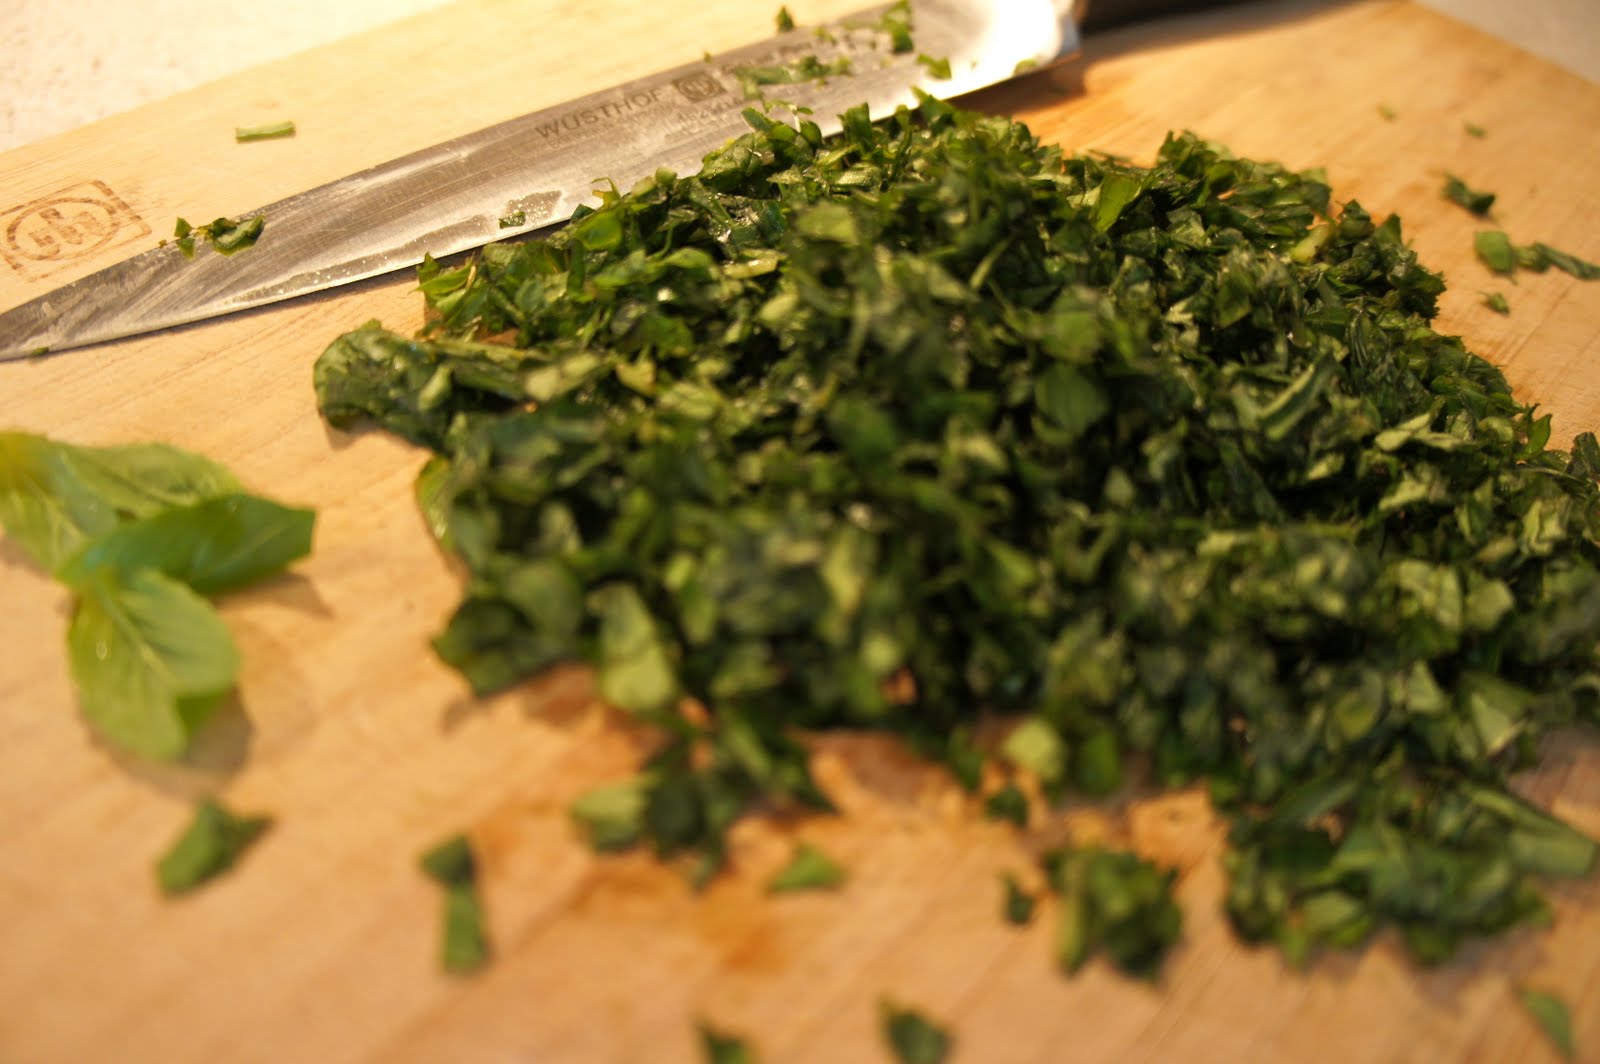
fresh thyme
4 eggs
½ cup heavy cream
½ tsp salt
¼ tsp pepper
¼ tsp nutmeg

Flour each pie dish.
On a lightly floured counter, roll out the dough to a circle, 1/8 inch (3mm) thick, and cut out circles of dough large enough to line up each pie dish (My dishes are 4 inches in diameter, so I cut out 6 inch diameter circles).  Prick the bases with a fork to air out the dough. Line each crust with parchment paper and fill these up with pie weight or dry beans. Refrigerate for at least 30 minutes. This will prevent shrinkage of the dough when you bake the crusts.
Preheat the oven to 350F.
In the meantime, sautee the chopped shallots in a lightly oiled frying pan until evenly golden. Reserve.
Pick the green leaves off each branch of fresh thyme. You should get ½ cup to ¾ cup of thyme leaves.
Cut each tomato in half, and each half in slices about ¼ inch thick. Reserve.
Beat together the eggs, cream, salt, pepper and nutmeg.
Bake the quiche crust (still covered with pie weights) for 10 minutes.
Fill each crust as follow:
-       - The sautéed shallots at the bottom
-       - Thyme
-       - Crumbled goat cheese
-       - Slices of tomatoes, fanned out
-       - Thyme
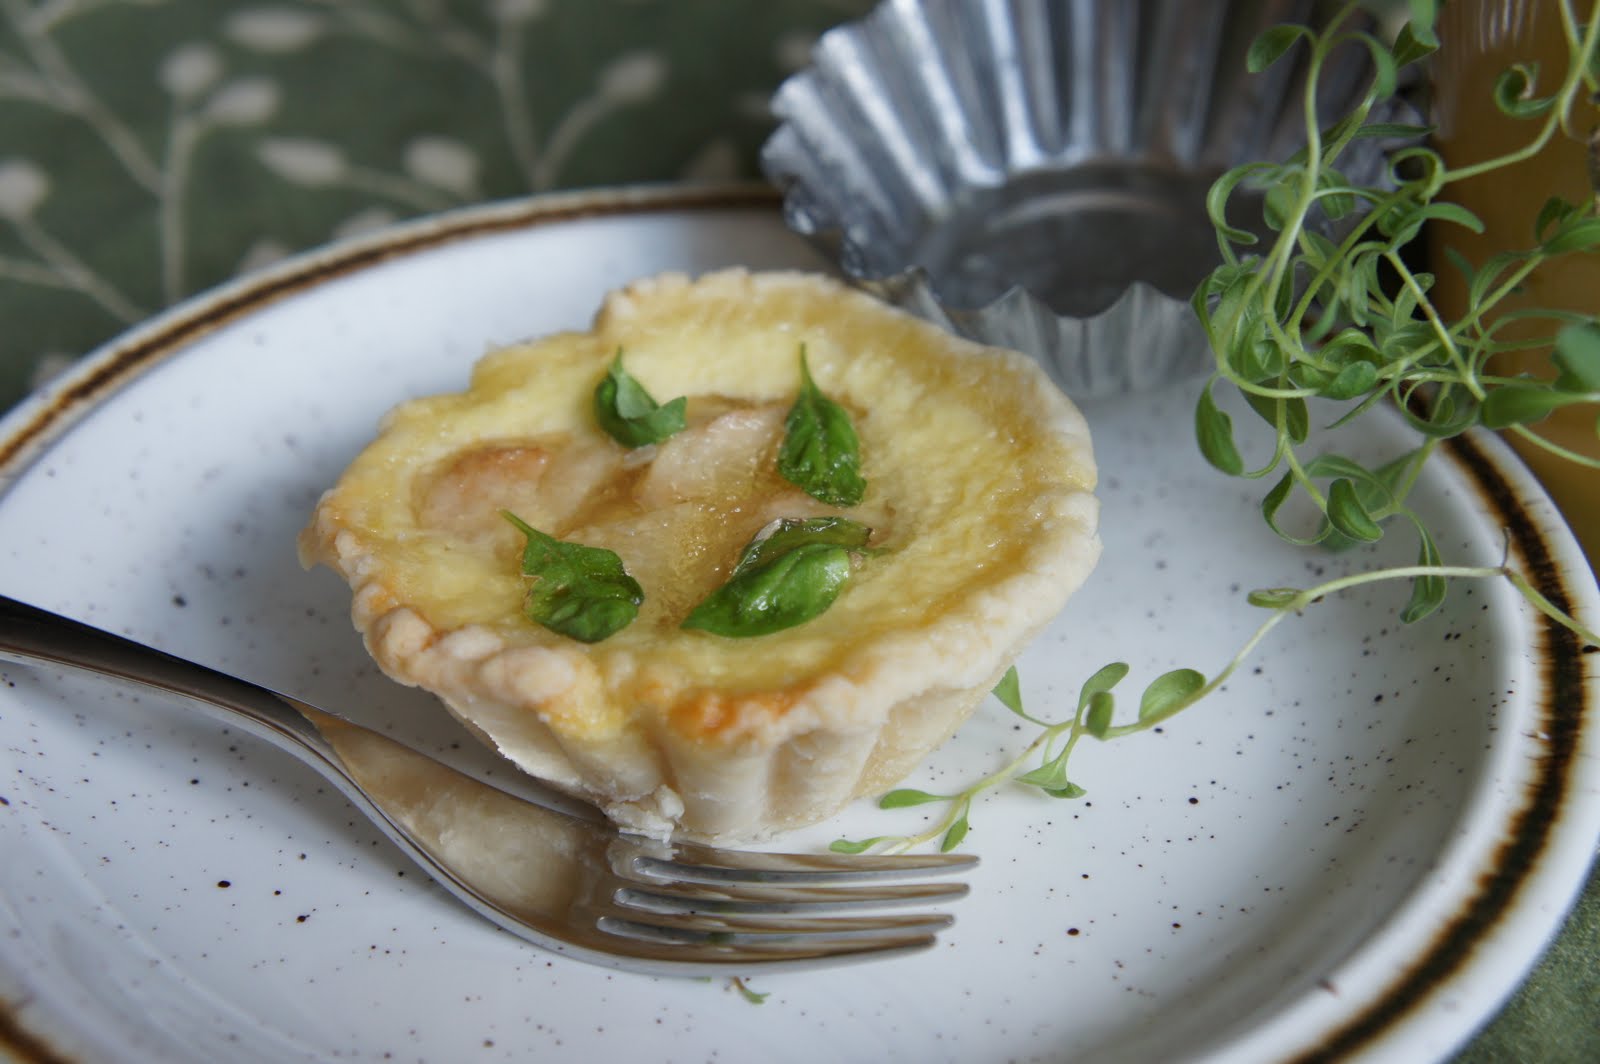
Finally, fill up the remaining space in the crust by pouring the creamy egg mixture right in the middle of each quiche.
Bake for 40 to 45 minutes in the middle of the over, until the tomatoes appear to be cooked and the custard is slightly golden.
Let the quiches cool and serve at room temperature with a salad of baby spinach, quail eggs and shavings of pecorino cheese. A bottle of rose wine wouldn’t hurt either (if you are not pregnant).


Basil and pine nut macarons

Hurricane Irene came and went. The New Yorkers, who didn't have to evacuate, were stuck home and, stricken by cabin fever, decided to use some of this extra food they frantically packed in their cupboard for the long weekend and spent some time by their miniature stove. I am no exception. What else was there to do this weekend? Listen to the media go on and on over Irene? No thank you. In the end, I made ice cream, berry pancakes, a custard pie, a paella.... I think we all gained weight in the end. Final assessment of Irene's damages: + 5 pounds per head in this house.
This past week, however, a dear friend of mine was kind enough to share her excess basil with me so I could bake macarons - Thank you Allie! Indeed, I had the excentric idea to make basil shells and fill them up with pine nut paste. Call these: "pesto macarons"! I wasn't too sure how my shells would turn out if I incorporated chopped leaves in them, but I was pleasantly surprised. The shells had a delicious basil aroma when coming out of the oven and tasted even better on my palate.

Basil & Pine Nut Macarons: (Macarons au Basilique et aux Pignons de Pin)


90g aged egg whites (about 3, aged on your kitchen counter 24 hours or longer)
110g almond meal
200g powdered sugar
30g granulated sugar
1 cup of fresh basil leaves, chopped as small as possible
optional: green food coloring (preferably in powder form)

Pine Nut Paste for the filling:
1/2 cup pine nuts
2 tbsp powdered sugar
2 tbsp unsalted butter, softened
1/4 tsp sea salt

Sift together the almond meal and powdered sugar in a big bowl.  You don't want any lumps in there. Throw in the finely chopped basil.
In a separate bowl, beat the egg whites with an electric mixer. You may add the green food coloring at this point if you wish. When the whites start foaming, throw in the granulated sugar. Beat on high until stiff peaks form.
With a rubber spatula, dump the egg whites in the almond mixture and FOLD gently until the dry ingredients and egg whites are well married. However, do not stir too much. Run a knife through. If the line disappears after ten seconds, stop folding.
Throw this paste in a large  decorator bag (fitted with an Ateco #807 tip if possible) and pipe away on a silpat covered baking sheet. The macarons should be about 2 inches in diameter and 1 inch apart as they spread a little.
Let them rest for 20 to 30 minutes. Pre-heat your oven on 280F.
Bake the macarons for 18 minutes (keep an eye on them and you can give them a push with a finger to see if they are set). Let cool completely.

Prepare the filling by throwing the pine nuts in a food processor. Process until crumbly and add in the powdered sugar and salt. Pulse until incorporated. Add in the softened butter and pulse some more until the mixture is creamy.
Spread a layer of this pine nut paste on a shell and cover with another shell. Repeat with all shells and refrigerate overnight to allow the filling to harden and the flavors to marry. 


Saturday, August 20, 2011

Fresh goat cheese and basil ice cream (without an ice cream maker!)

I have been dreaming of making this batch of ice cream over the past 3 months - since before getting pregnant. And now that I indeed have a bun in the oven, I have a good excuse to indulge in ice cream making (and cheese making for that matter!).
This experience actually light up something inside my little head - simple as it was to make this goat cheese, I loved every step, especially the tasting step. There is something so thrilling about making your own cheese or ice cream.
I admit that this was not the best goat cheese I've ever had. The best goat cheese I've ever had was introduced to me by my parents who live in the rustic mountain of the Jura, east of France. They drive 30 minutes to this little farm (a shack, really) and this little farm lady (just as rustic looking as the farm and the region she inhabits) makes the most divine cheese from the milk of her goats. Just like you can tell a good wine from its long length on your palate, her goat cheese has the longest length and most perfect balance. You can still taste it on your tongue 10 minutes after your first mouthful. Divine.
The goat cheese I made was nothing as impressive, although very good, fresh and spreadable.
Out of a quart of Meyenberg goat milk (minus one cup for the ice cream), I made about half a cup of goat cheese.

Homemade Goat Cheese: (Fromage de Chevre Maison)

Makes about 1/2 cup 
(Adapted from Serious Eats recipe)


1 quart minus 1 cup goat milk
1/2 cup fresh lemon juice
1 tsp sea salt

Pour a quart of full fat goat milk in a heavy bottom sauce pan and heat up until the milk reaches 180 degrees (F). Use a candy thermometer to check the temperature. Remove from heat and stir in lemon juice. Let stand (for about 30 minutes or an hour). The milk will curdle.
Line a sieve or colander with either 5 or 6 layers of cheese cloth (the kind you find at the supermarket) or better yet, a good piece of fine muslin cheese/butter cloth (you can purchase this on Amazon). Place the sieve/colander over a medium size bowl to catch the whey drips.
Pour the curdled milk in the sieve/colander and cover up with a plate or the corners of the cloth. Let the whey drain for 2 hours. You will then have a soft grained, greek yogurt like matter in your cloth. Gather the 4 corners of the cloth and squeeze gently some more whey out of the cloth.
Transfer the cheese into a bowl and refrigerate covered with plastic wrap.

You could stop right here, add fresh herbs and spread this cheese on toasts or slices of fresh baguette. Or you could go ahead with the ice cream plan - you won't regret it.

This goat cheese ice cream is so far the best ice cream I have ever made. It marries the beautiful tastes of cream and basil, and the rustic taste of goat cheese (more of an after taste actually). The cheese gives the ice cream a cheesecake-like consistence, and when you take the ice cream out of the freezer, it won't be rock solid but instead soft and ready to serve immediately.

Goat Cheese and Basil Ice Cream: (Creme Glacee au Chevre et Basilique)

Makes about 1 quart


1 cup goat milk (full fat)
2 cups heavy cream (from cow milk)
1 cup granulated sugar
Basil leaves, about 1 cup
1/2 cup fresh goat cheese

In a heavy sauce pan, stir together milk, cream and sugar and bring to a boil. Remove from the heat and let stand for 10 to 15 minutes.
In the meantime, prepare an ice bath by pouring water over ice cubes in a medium size bowl.
Pour the cream into a large ziploc bag placed in the ice bath and add in the basil leaves.
Seal the bag and place the bowl and bag in the fridge overnight, or at least 4 hours.
Take the goat cheese out of the fridge at least one hour before the next step: Pour the cream into the softened goat cheese, straining the basil leaves. Whisk all lumps of cheese away.
Pour into a freezer safe container and place in the coldest part of your freezer for 2 hours (OR, if using an ice cream machine, pour the mixture into the machine and start churning according to the manufacturer's instructions).
Take the container out of the freezer and, beat the cream with an electric beater on medium speed for a few minutes. This is to break the ice crystals. Place the container back in the freezer for 2 more hours.
Break the ice crystals with an electric beater again and put the container back in the freezer for 2 hours.
One third and last time, beat with your electric beater, and re-place in the freezer, this time for 4 hours.
Reaching 180 degrees

Setting up the cheese cloth over a sieve

Curdling

The pour

Draining the whey

Starting to look cheesy!

Draining the last drops of whey

Say cheese!

Divine basil leaves

Cold soaking

Beating up the cream

Tasting

Serve over fresh raspberries.

Doughnut peach,basil and buttermilk tartelettes

Because I had doubled my buttermilk tart dough recipe, I expanded a bit on the buttermilk theme. Plus, I am the proud owner of the cutest little tart molds - about 3 inches in diameter and 2 inches deep. Pregnant as I am, I often have this 3 o'clock tummy call for something yummy to eat, and since doctors recommend eating small portions...
So this is gonna be an easy post, since half of the work is done (the pie dough that is). As for the pear tartelette, I recommend you split your dough in 2 before rolling down, and keep one half in the fridge since it is best to work with very dough.

Doughnut Peach, Basil and Buttermilk Tartelettes: (Tartelettes aux Peches Plates, Basilique et au Babeurre)

For 6 small (about 3 inches in diameter) tartelettes


Buttermilk Tart Dough (see previous post - Buttermilk Pear Tartelettes)
3 doughnut peaches, peeled, halved, then each half cut in about 4 or 5 slices
2 medium eggs
1/4 cup buttermilk
1 1/2 tbsp unsalted butter, melted
1/4 sugar
2 tbsp lemon juice
pinch of salt
a handful of small basil leaves
1 sachet gelatine
2 tbsp water
1/2 cup pear or apple juice


If your tartelette molds need to be floured, go for it.
Roll out half of the dough on a floured surface (keep the other half of dough in the fridge). Cut up circles of the diameter you need for your tartelette molds. Fill up each molds with the circle of dough. With a fork, poke tiny holes in the dough. Cover each tart with a cut-out circle of parchment paper and fill up with pie weights or dry beans Let the unbaked crusts chill 30 minutes to an hour in your fridge.

In the meantime, prepare the custard by whisking together the melted butter, sugar, eggs, buttermilk, salt and lemon juice.
Peel, core and slice the peaches in 2, then cut each half them up in 4 or 5 slices.

Preheat your oven to 350°F.
Bake the crust for 10 minutes.
Place half a sliced up peach delicately inside each crust. Cover up with custard and put back in the oven for about 45 minutes or until the surface of the tartelettes and peaches golden.
Let chill completely.

Arrange a few basil leaves on each chilled tartelette.
Prepare a glaze by mixing the content of a gelatine envelope with a tablespoon of water and when dissolved, whisk in apple or pear juice. 
Pour one or two spoon of this liquid on each pie so that the basil leaves are covered and the liquid reaches to the edge of the crust. 
Chill in your fridge for at least two more hours.

Serve at room temperature (the tartelettes should unmold easily at room temperature).